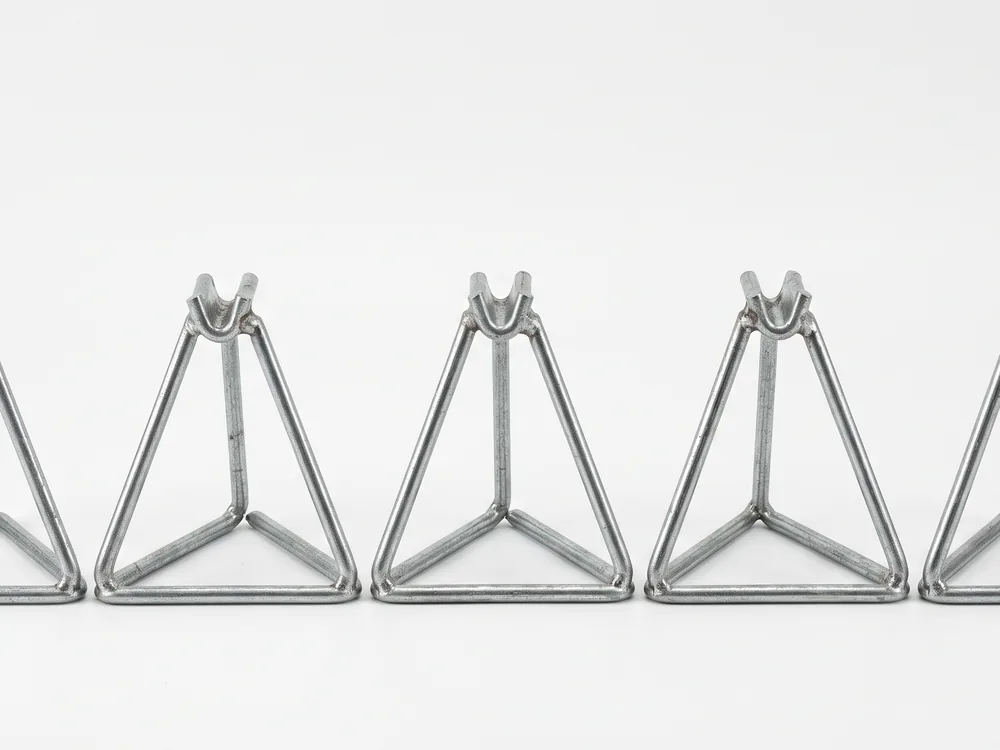
Why the range is so wide
The gap between "one per 1.4 m2" and "one per 3.5 m2" is not sloppiness. It reflects real choices made on the deck. Grid spacing is the biggest driver, but bar diameter, cover depth, and how much loading the mat will take before and during the pour all shift the number.
Lighter mats with small-diameter bar sag more between supports, so they need a tighter grid. Heavy bar sitting on point loads can punch through a chair that is too small, so spacing there is about capacity, not sag. And any area where workers walk, park a buggy, or drag a hose needs extra support regardless of the theoretical grid. That is why we always quote a range and encourage a quick site count rather than a single blanket figure.
At Leeter we have shipped rebar chairs to slab jobs across North America and Europe since 2006, and the same question comes up on almost every enquiry. The honest answer is that the slab drawing and the bar schedule decide the count, not a rule of thumb. Still, a rule of thumb gets you a fast material estimate, and that is what most buyers want first.
The grid calculation
Support quantity comes straight from geometry. If chairs sit on a square grid with spacing S (in metres) in both directions, each chair covers an area of S x S square metres. So the count per square metre is simply 1 divided by (S x S).
Flip that around and you get the area each chair carries. A 1.2 m grid gives 1.2 x 1.2 = 1.44 m2 per chair, which is roughly one chair for every 1.4 m2 of slab. Tighten the grid to 1.0 m and each chair covers 1.0 m2, so you need one per square metre. Open it up to 1.5 m and coverage jumps to 2.25 m2 per chair.
Here is how the common grids compare.
| Chair grid spacing | Area per chair | Chairs per 100 m2 (grid only) | Typical use |
|---|---|---|---|
| 0.9 m (approx 3 ft) | 0.81 m2 | 124 | Thin slabs, small bar, heavy traffic |
| 1.0 m | 1.00 m2 | 100 | Light residential and commercial slabs |
| 1.2 m (approx 4 ft) | 1.44 m2 | 70 | Standard slab-on-grade, common default |
| 1.5 m | 2.25 m2 | 45 | Heavier bar, stiff mats, low traffic |
| 1.8 m (approx 6 ft) | 3.24 m2 | 31 | Very stiff mats, upper limit for many specs |
Two things to notice. First, halving the spacing roughly quadruples the chair count, because area scales with the square of the distance. Second, the "grid only" column is a floor, not a final number. It ignores edges and extras, which is where the real figure climbs.
Why real layouts need more than the grid
The grid count assumes a perfect interior field with no boundaries. No slab is like that. Every free edge, every construction joint, and every penetration wants a chair close by so the bar does not tip or drop where it matters most for cover.
A practical way to handle this is to add a perimeter allowance on top of the field count. Place chairs along each edge at the same spacing as the field, then add roughly 10 to 20 percent to the total for traffic zones, congested corners, and the general reality that bars flex when people work on them. On busy decks where crews walk the mat during the pour, that uplift can reach 25 percent.
This is the step that moves you from one chair per 1.4 m2 on paper to one per 2 to 3.5 m2 in practice. When the spec is loose and the mat is stiff, planners often thin out the interior grid while keeping the edges tight, which pushes the average area per chair upward. When the spec is tight or the slab is thin, the grid stays dense and the average area per chair drops.
A worked example: 200 m2 slab
Take a 200 m2 slab-on-grade with a single mat of medium bar and a specified maximum chair spacing of 1.2 m. Start with the grid: 200 divided by 1.44 gives about 139 chairs for the interior field. That is the geometric baseline.
Now add the real-world extras. Assume a perimeter of roughly 60 m for a slab near 20 m by 10 m. Chairs every 1.2 m along that edge add about 50 supports, though many overlap the field grid, so count perhaps 25 as genuinely extra. Then apply a 15 percent traffic and congestion allowance to the running total. The table below shows the build-up.
| Step | Calculation | Chairs |
|---|---|---|
| Interior grid field | 200 m2 / 1.44 m2 | 139 |
| Edge and joint additions | approx 25 extra | 25 |
| Subtotal | 139 + 25 | 164 |
| Traffic allowance (15%) | 164 x 1.15 | 189 |
| Rounded order quantity | round up plus waste | 200 |
So a slab that looks like "139 chairs" on the grid realistically needs around 190, and a sensible purchase order rounds to 200 to cover breakage and misplacement. That final figure works out to one chair per square metre of slab, well inside the 2 to 3.5 m2 range once you remember the 1.2 m grid is on the dense side. Loosen the grid to 1.5 m and the same slab drops to roughly 110 to 120 chairs, or about one per 1.7 m2. The spec drives the answer.
For a fuller breakdown of how spacing limits are set, see our guide on rebar chair spacing, which covers the code and sag reasoning behind these grids.
Counting continuous supports by linear metre
Individual chairs are not the only option. Continuous bar supports, sometimes called continuous high chairs or slab bolsters, run in lines under the mat and carry bar along their whole length. For these you do not count pieces per square metre. You count linear metres of support, then divide by the stock length of each unit.
The logic mirrors the grid. If you run support lines every 1.2 m across a slab, then each metre of slab width needs roughly 0.83 linear metres of bolster per metre of run, because the lines sit 1.2 m apart. For a 200 m2 slab measuring 20 m by 10 m, running bolster lines the full 20 m length every 1.2 m across the 10 m width gives about 9 lines. Nine lines at 20 m each is 180 linear metres of continuous support.
Divide by the bolster stock length to get piece count. At 3 m per piece that is 60 pieces; at 2 m per piece it is 90. The table shows how line spacing changes the total.
| Support line spacing | Number of lines (10 m width) | Total linear metres (20 m runs) | Pieces at 3 m each |
|---|---|---|---|
| 0.9 m | 12 | 240 | 80 |
| 1.2 m | 9 | 180 | 60 |
| 1.5 m | 7 | 140 | 47 |
Continuous supports shine on wide, open slabs because they spread load along the bar and reduce point-load punching into the base or foam. Individual rebar chairs stay more flexible for congested areas, odd shapes, and spot fixes. Many jobs use both: bolster runs across the field, individual chairs at edges and around penetrations.
Choosing between chairs and continuous supports
The decision usually comes down to slab shape, bar weight, and base type. On a clean rectangular field with heavy bar, continuous bolster is fast to place and distributes load well. On a slab full of pits, curbs, and pipe penetrations, individual chairs adapt better and waste less material.
Base material matters too. On compacted stone or a vapour barrier over stone, a wider foot spreads load and stops the support sinking, so continuous bolster or wide-plate chairs help. Over rigid foam insulation, both types work, but you want a broad bearing area either way. We often advise buyers to price both options against the same slab, because the cheaper unit per piece is not always the cheaper installed cost once labour is counted.
Whatever you choose, order a modest surplus. Chairs get crushed underfoot, dropped, and misplaced, and a short delivery stops a pour. A 5 to 10 percent overage on the calculated quantity is cheap insurance against a stalled crew.
Frequently asked questions
How many rebar chairs per square meter should I plan for?
Plan for roughly one chair per 1 to 3.5 m2 depending on grid spacing and loading. A dense 1.2 m grid with edge and traffic allowances lands near one per square metre. A looser 1.5 to 1.8 m grid on stiff mats stretches to one per 2.5 to 3.5 m2. Always confirm against the project spec and bar schedule.
What chair spacing does a typical slab-on-grade use?
Most standard slab-on-grade jobs use a chair grid around 1.2 m (about 4 ft) in each direction. Thin slabs with small bar or heavy foot traffic tighten to 0.9 to 1.0 m, while stiff mats with heavier bar can open out to 1.5 m or more. The controlling factor is keeping bar sag within the specified cover tolerance.
How do I convert my slab area into a chair order quantity?
Divide the slab area by the area each chair covers, which is the grid spacing squared. Add roughly 10 to 20 percent for edges, joints, and traffic, then round up and add a few percent for breakage. For a 200 m2 slab on a 1.2 m grid, that gives about 190 chairs, so a 200-piece order fits well.
When should I use continuous supports instead of individual chairs?
Use continuous bolster runs on wide, open, rectangular slabs with heavy bar, where spreading load along the line prevents punching into the base. Use individual chairs on congested slabs with pits, curbs, and penetrations, where you need to adapt around obstacles. Many crews combine bolster across the field with chairs at edges.
How much surplus should I order?
Order 5 to 10 percent above your calculated quantity. Chairs get stepped on, dropped, and misplaced during a fast pour, and a shortage stalls the crew. On heavy-traffic decks where workers walk the mat, lean toward the higher end. The extra cost is small compared with the price of a stopped concrete pour.
Need a firm count for your slab? Send us the area, bar schedule, and spacing spec, and we will help you size the order. Request a quote and our team will match the right chair or continuous support to your job.
