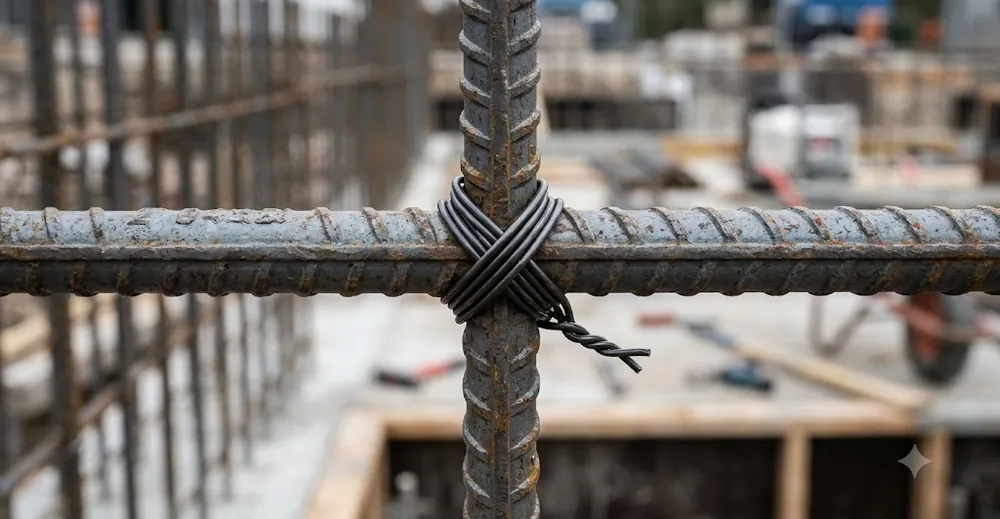
The four ties, and when to reach for each
There are four rebar ties you will use on almost any job: the snap tie (also called the simple tie), the saddle tie, the wrap-and-twist tie, and the figure-8 or double-strand tie. Each one trades speed against holding strength. The snap tie is your fast, high-volume knot for flat slab mats lying on the ground, where gravity does most of the work and you only need the bars to stay indexed on their grid. The saddle tie steps up the hold by wrapping the wire around the perpendicular bar before twisting, which stops the joint from rotating. The wrap-and-twist, and its close cousin the figure-8, are the heavy holders you want on vertical work: wall curtains, column cages and any intersection that has to survive being lifted, walked on, or hammered by a pour.
Choosing between them is a judgment call about load, orientation and inspection. On a flat parking deck you might snap-tie thousands of intersections a shift. On a shear wall you tie fewer joints, but every one has to fight gravity and vibration, so you spend the extra seconds on a saddle or a double strand.
How do you make a snap tie (simple tie)?
The snap tie is the fastest knot in the trade and the one most crews learn first. You cut or pull a pre-cut wire, usually a 16 gauge annealed bag tie around 6 to 8 inches long, fold it in half, and pass it diagonally under the crossing point so it wraps both bars. Bring the two ends up on the opposite corner, cross them, and twist them together three to four turns with your fingers or a hook. Snip the pigtail short so nothing snags a boot or a screed.
Where does it belong? Flat horizontal mats sitting on chairs or the subgrade, where the bars are already resting in place and you only need to hold the grid spacing. It is quick and it is clean, but it offers the least resistance to rotation and pull-out. Do not trust a snap tie on anything vertical or anything that gets walked hard, because a sideways nudge can spin the joint loose. Think of it as an indexing tie, not a structural clamp.
How do you tie a saddle tie?
The saddle tie is the workhorse upgrade when a snap tie will not hold its position. Instead of a single diagonal pass, you take the wire around the underneath bar so it forms a U, or saddle, that hugs the lower rebar. Both ends come up on the same side of the top bar, and you twist them together tightly. The wrap around the bottom bar is the whole point: it locks the joint against rotation far better than the diagonal snap, because the wire is now captured on three sides of the intersection.
Crews reach for the saddle tie on mats that will carry foot traffic, on the top curtain of a slab where bars want to shift, and anywhere an inspector is looking for a joint that will not spin. There is a heavier version, sometimes called the saddle-and-twist or wrapped saddle, where you carry the wire further around both bars before twisting. That variant edges toward wall-grade holding strength while still going on fast. On a good day a practiced hand can saddle-tie nearly as quickly as a snap.
When do you use a wrap-and-twist or figure-8 tie?
The wrap-and-twist and the figure-8 tie are your vertical-work knots, the ones that keep a wall or column cage from sagging before the concrete supports it. For a wrap-and-twist you loop the wire fully around both bars, sometimes twice, then twist the tails hard so the whole joint is cinched. The figure-8, or double-strand tie, runs the wire in a crossing figure-eight pattern through the intersection so two separate strands share the load before you twist them off. That doubled path is what gives it the highest pull-out resistance of the common ties.
Use these on wall curtains where bars hang against form ties, on column verticals lashed to hoops, and at any splice or lap that must not creep. They take longer per joint, so nobody double-strands a whole slab. You place them where movement is the enemy: corners, laps, lifting points, and the intersections a pour vibrator will hammer directly. On precast cages that get craned into place, the figure-8 is often specified because the whole assembly has to travel without racking.
Rebar tie comparison at a glance
Here is how the four ties stack up in the field. Holding strength is relative, not a lab figure, and reflects what we see hold up during real pours.
| Tie type | Relative hold | Speed | Best use |
|---|---|---|---|
| Snap / simple | Low | Fastest | Flat slab mats on grade, indexing the grid |
| Saddle | Medium | Fast | Foot-traffic mats, top curtains, anti-rotation joints |
| Wrap-and-twist | High | Slower | Walls, columns, laps and splices |
| Figure-8 / double-strand | Highest | Slowest | Vertical cages, lifting points, precast assemblies |
Read the table as a menu, not a rulebook. The right tie is the lightest one that still holds through placement and vibration, because every extra wrap is time multiplied across thousands of joints.
Hand tying versus tools: pliers, hooks and twisters
Most ties still go on by hand, and the humble tool of the trade is the pigtail hook or a pair of end-nip pliers. A hook lets you catch the wire loop, spin three or four twists, and snip in one motion, which is why old hands can tie faster than you would believe. Pliers give more grip for cinching a heavy wrap-and-twist tight on wall steel. Either way, the skill is in the twist count: too few and the joint is loose, too many and you work-harden the wire until it snaps at the neck.
For volume work, powered tools change the math. Manual rebar twisters pull and spin a pre-cut wire in one stroke and save the wrist over a long shift. Battery rebar tying guns go further, feeding, wrapping and twisting a consistent knot in under a second, which is a real advantage on big flat decks where repetitive strain is the silent cost. The trade-off is that automatic guns favor standard intersections; tight corners and congested laps often still get finished by hand. On most sites we see a blend: a gun for the open field and a hook for the awkward joints.
Choosing the wire so the tie actually holds
A perfect knot in the wrong wire still fails. Soft, fully annealed low-carbon steel is the standard because it bends sharp and cinches without cracking. Gauge is the other half of the decision: 16 gauge is the everyday choice for standard rebar, while heavier 15 or even 14 gauge earns its place on large-diameter bar and demanding vertical cages. Too thin and the tie stretches or snaps under vibration; too thick and it fights the twist, tiring hands and leaving joints under-tightened.
For heavy holding on big cages, pre-formed double loop bar ties speed things up because the loop is already shaped: you hook, pull and twist without measuring or folding. That consistency matters for inspection, since a uniform tie pattern reads as a controlled placement. Whatever you run, keep the wire clean and dry. Rust flakes and kinks turn a fast tie into a fight, and a fought tie is usually a loose one.
Tying so it passes inspection and survives the pour
Inspectors are not counting knots for fun; they are checking that the cage will not move. A common rule of thumb is to tie enough intersections that nothing shifts, often every joint on the perimeter and around openings, with a regular pattern through the field so no bar can float. Alternate the twist direction on adjacent ties if you want to keep the mat from creeping one way under the screed. Fold every pigtail down and inward, away from the form face and away from the concrete surface, so twist ends never sit in the cover zone where they can rust and stain.
Before the truck arrives, walk the mat and grab bars at random. If a joint spins, retie it. If a chair has kicked out, reset it. The five minutes you spend checking ties is cheaper than the hour you spend rodding floating steel with concrete already flowing. A cage that holds its geometry through the pour is the whole job of a tie, and it is why we treat the humble knot as a structural detail, not an afterthought.
Frequently asked questions
What gauge tie wire should I use for rebar?
For standard reinforcing bar, 16 gauge annealed tie wire is the everyday choice because it folds sharp and cinches without cracking. Step up to 15 or 14 gauge on large-diameter bar and vertical cages, where the extra thickness resists stretch and vibration during placement and the pour.
How many intersections do I need to tie?
Tie enough that the mat cannot move. In practice that usually means every intersection on the perimeter and around openings, plus a regular pattern through the field so no bar floats. Follow the project drawings and your local code, since some structural work calls for tying every crossing.
Is a snap tie strong enough for walls?
No. A snap tie only indexes bars on a flat mat and spins loose under sideways load. On walls, columns and any vertical cage, use a wrap-and-twist or figure-8 double-strand tie, which cinch fully around both bars and resist the rotation and pull-out that gravity and vibration cause.
Should I use a battery tying gun or tie by hand?
Use both. A powered gun or twister shines on open flat decks, delivering a consistent knot fast and sparing your wrist over long shifts. Tight corners, congested laps and odd intersections are still quicker and more reliable by hand with a hook or end-nip pliers.
Which way should I fold the pigtail ends?
Fold every twisted end down and inward, toward the concrete core and away from the form face. Ends left in the cover zone can rust, stain the surface and snag boots or screeds. A tucked pigtail keeps the tie out of sight and out of the corrosion-prone outer layer.
Talk to us about tie wire and tools
Whether you are running snap ties across a slab or double-strand ties up a column, the wire and tool you choose decide whether the tie holds. We manufacture annealed tie wire, pre-formed loop ties, twisters and reinforcing accessories for contractors across North America and Europe. Tell us your bar sizes and pour conditions and we will match the gauge and tie to the job. Request a quote and we will help you spec it right the first time.
