Below we explain where rod chairs fit against heavier bar chairs and bolsters, what heights and wire gauges are typical, and how the cost compares. If you already know your layout and just need pricing, you can request a quote at any point.
What is a rod chair?
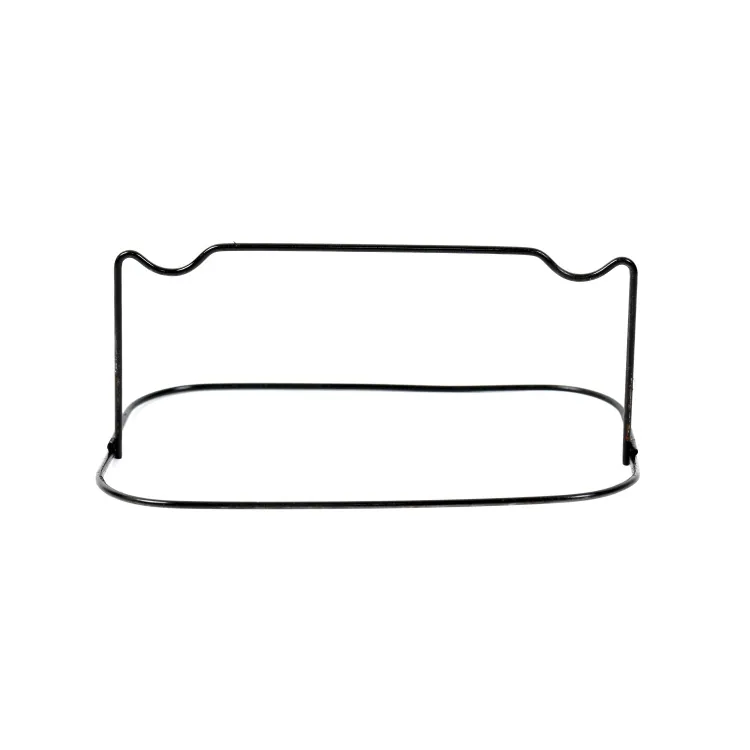
A rod chair is a lightweight wire support bent from a single length of steel rod or wire. It has two legs that spread apart to sit flat on the deck, and a raised center that holds the reinforcement at a set clear cover. The name comes from the round rod stock used to make it, which separates it from stamped or plastic supports.
The design is deliberately minimal. There are no extra runners, no continuous base, and no plastic tips unless you ask for them. That simplicity is the point. When a slab carries a single mat of welded wire mesh or a grid of small-diameter bars, a full bolster is overkill. The rod chair does the same job for less material and less money.
Rod chairs are usually sold either galvanized or bright (plain steel wire). For exposed or corrosion-sensitive work, crews add plastic-tipped feet or specify a coated version. For buried slab-on-grade where the chair is fully encased in concrete, plain wire is common and perfectly acceptable.
When should you use a rod chair instead of a bar chair or bolster?
Use a rod chair when the reinforcement is light, the spans between supports are short, and foot traffic during the pour is limited. Rod chairs shine under welded wire mesh, single mats of #3 to #5 bar, and residential or light-commercial slabs on grade. They are the economical choice when load is low.
Reach for a heavier support when conditions get tougher. Continuous slab bolsters and beam bolsters carry a linear run of bars and resist crews walking on the mat far better than a point support ever will. If you have a double mat, heavy top steel, or a deck that will see wheelbarrows and boots before the pour, a bolster or a beam bolster upper (BBU) is the safer pick.
Here is a quick way to think about the trade-off between the common supports.
| Support type | Best for | Typical reinforcement | Relative cost |
|---|---|---|---|
| Rod chair | Slab-on-grade, single mat, mesh | Wire mesh, #3-#5 bar | Lowest |
| Rebar chair | General slab and wall work | #4-#6 bar | Low to medium |
| Slab bolster | Continuous support under mats | Mesh and small bar | Medium |
| Beam bolster | Beams, heavy bottom steel | #5 bar and up | Higher |
The rule of thumb is straightforward. Match the support to the load and the abuse it will take. A rod chair is not weaker by accident; it is right-sized for the light jobs that make up a large share of everyday concrete work.
What heights and wire gauges do rod chairs come in?
Rod chair height is measured from the deck to the saddle that holds the bar, and standard heights run roughly from 3/4 inch up to about 6 inches. The most requested sizes cluster between 1 inch and 4 inches, because that range covers the clear cover most slabs specify for mesh and light bottom steel.
Getting the height right is about clear cover. If your drawing calls for 1-1/2 inches of cover under a single mat, you order a rod chair sized so the saddle sits at that height. Ordering a mix of two or three heights on a large pour is normal, since footings, thickened edges, and the field of the slab may each call for a different cover.
Wire gauge is the other variable. Lighter slabs use a smaller gauge to keep cost down, while taller chairs and heavier bars need a thicker wire so the legs do not splay or the saddle does not sag. As a general guide:
- Short chairs (under 2 in): lighter gauge wire is fine because the load path is short and stable.
- Medium chairs (2 to 4 in): a mid-gauge wire balances stiffness and cost for typical slab mesh.
- Tall chairs (over 4 in): heavier gauge, and often a wider foot spread, to keep the chair from tipping under load.
Foot spread matters as much as gauge. A wider base resists punch-through on soft subgrade and stops the chair from rocking when a worker steps near it. When you order, tell your supplier the bar or mesh size, the required height, and whether the subgrade is firm or soft. Those three facts let a good manufacturer recommend the right gauge and foot design without guesswork.
How much do rod chairs cost, and why are they economical?
Rod chairs are the lowest-cost wire support in the common lineup because they use the least material and the simplest bend pattern. A rod chair is essentially one piece of wire with a few bends, so there is little scrap, fast production, and low shipping weight. That combination keeps the unit price down.
Cost per chair is only part of the picture. The real saving shows up in spacing and quantity. Because rod chairs are cheap, crews can place them at the spacing the engineer specifies without worrying about the support line item. Under-supporting a mat to save money is a false economy; sagging mesh ends up too close to the surface and loses its structural value.
A few honest points on where rod chairs cost more or less:
- Galvanized vs plain: galvanizing adds cost but buys corrosion resistance for exposed edges.
- Plastic tips: add a small cost per chair, worth it where the steel foot would otherwise show or stain.
- Height and gauge: taller chairs and heavier wire cost more per piece, so order the height you actually need rather than defaulting to the tallest.
- Volume: rod chairs ship and stack efficiently, so large orders lower the landed cost per piece for export buyers in North America and Europe.
For most slab-on-grade jobs, the rod chair is the support that lets you follow the drawing without inflating the budget. That is the whole reason it exists.
How do you place rod chairs correctly on the deck?
Place rod chairs on firm subgrade or clean formwork at the spacing shown on the placing drawings, typically in a grid that keeps the mesh or bar from sagging between supports. On soft ground, set the chairs on small bearing plates or pavers so the feet do not punch into the subgrade under load.
Good placement comes down to a few habits. Keep the rows square so the mat holds a consistent cover across the slab. Stagger the chairs under lap splices where the steel is doubled and heavier. Walk the mat before the pour and reset any chair that has tipped or sunk, since one collapsed support can pull a whole run of mesh out of position.
Tie the mesh to the chair saddle where movement is a risk, especially near ramps or edges where crews drag the reinforcement. Tying is quick and prevents the mat from creeping during concrete placement. During the pour itself, keep boots and hoses off the mat as much as possible; rod chairs are sized for the steel, not for people standing on them.
Frequently asked questions
Can a rod chair support double mats of rebar?
Not reliably. A rod chair is designed for a single mat of mesh or light bar. Double mats and heavy top steel put more load and more foot traffic on the support, which calls for a slab bolster, a beam bolster, or a taller individual high chair rated for the weight. Use the rod chair for the light-duty layer.
Are rod chairs and rebar chairs the same thing?
They are close cousins but not identical. A rod chair is the simplest two-legged wire support for mesh and light bar, while a rebar chair is a broader category that includes sturdier three- and four-leg designs for heavier slab and wall work. If your bars are #5 or larger, ask about a rebar chair instead.
Do rod chairs need to be galvanized?
It depends on exposure. For buried slab-on-grade where the chair is fully encased, plain steel wire is common and acceptable. For exposed slab edges, architectural surfaces, or corrosion-prone environments, choose galvanized wire or plastic-tipped feet so no rusting steel reaches the concrete surface.
What height rod chair do I need?
Order the height that matches your specified clear cover. Measure from the deck to where the saddle holds the bar. Most slab work uses chairs between 1 and 4 inches. When in doubt, check the placing drawing for the required cover under your mesh or bottom mat and match it exactly.
How many rod chairs do I need per square foot?
Follow the spacing on the engineer's drawing rather than a fixed rule, but many light slabs place supports on a grid of roughly 3 to 4 feet each way. Softer subgrade, heavier bar, or a wide mat spacing may call for tighter placement to prevent sag between supports.
Talk to a supports manufacturer
The rod chair earns its place on the jobsite by doing one job well and cheaply: holding light reinforcement and mesh at the right cover. Match the height to your specified cover, pick the wire gauge to the load, and place the chairs at the spacing on the drawing. Do that, and the mat stays where the engineer wants it without stretching the budget.
If you are sizing a slab-on-grade order or comparing rod chairs against bolsters and heavier chairs, our team can help you spec the right height, gauge, and finish for your project. Request a quote and tell us your bar or mesh size, required cover, and subgrade conditions, and we will point you to the most economical support that meets the spec.
